Showing posts with label home. Show all posts

Monday, May 31, 2021

Flooring Update - Luxury Vinyl Plank

If 2020 taught us anything, it was that it's worth the time and money to invest in your home. We spent so much of our time last year inside these walls, so splurging on updating some of the things we didn't love about our home made a lot of sense. 

From when we purchased the house, we knew we eventually wanted to update the flooring. The upstairs is carpet (yet to be updated) and the downstairs had hardwoods. While they weren't in terrible, they were a reddish wood stain and very, very shiny. They were also super soft and every scratch, ding, dropped fork and dog scratch showed on them. We wanted to invest in flooring that could withstand dropped utensils and dog claws and high heels AND match our style a little better. 

Here are some before photos that show the flooring: 


And now some of the after photos: 


We are so pleased with the flooring we chose for the downstairs. After many weeks of research and comparison, we decided on Lifeproof Luxury Vinyl Plank in Choice Oak. I'm pretty sure it's a Home Depot exclusive. And no, this isn't a sponsored post in any way. We just heard such great things about Lifeproof flooring that we ended up choosing it. 

We've had these floors now for a few months and we are so happy we did it. It makes a huge difference in the look of the downstairs and I can drop a knife or plate and not worry about creating a huge gouge in the flooring. When Bear (who has a beard) drinks water and drips from his water bowl into the living room, I'm not worried about water stains. Lifeproof flooring is waterproof and scratch resistant. It's also Floorscore Certified, has low VOCs and is formaldehyde-free for air quality purposes. 

Have you done any home updates during the last year?

Monday, May 7, 2018

Updates and a Square Living Room

This is a photo heavy post...so you've been warned. I feel good with the progress we've made in our house in the 5 weeks or so we've been there. I'm still struggling a bit with the living room. More on that below. First, I'll show you the dining room area as it is now.


We want to add two chairs with arms to the ends of the dining table and a rug under it. But I haven't found the perfect one yet. Also, I will replace the rectangle mirror above the server with a round or oval one...but again, haven't found the perfect mirror yet.

I like this area even though we haven't really used it yet. :) I know that will come as we get closer to the holidays and start to do more entertaining.

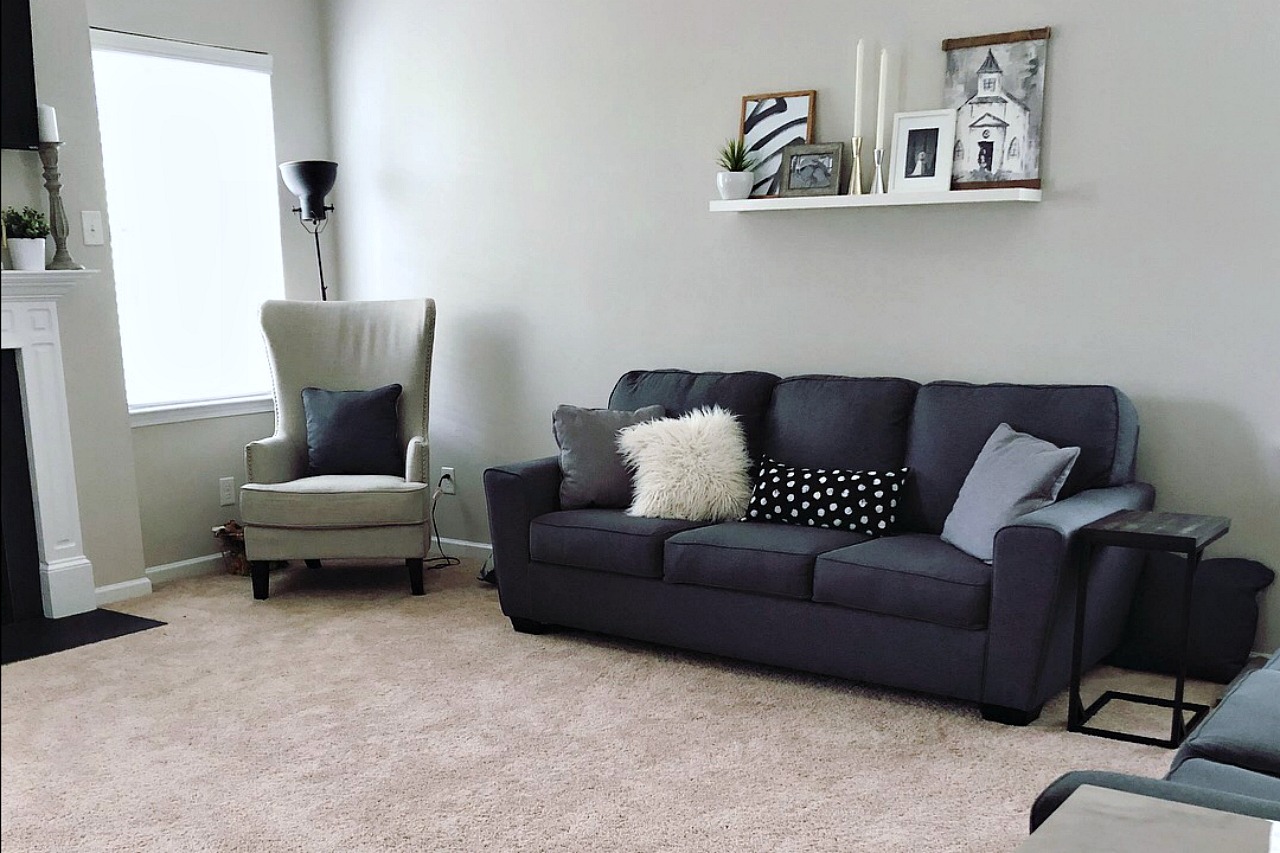
And now for the problem child. (and I say that most lovingly) Our living room is off the kitchen (which we love) but it's one big square. The left side of the square is a bar into the kitchen. So it's virtually unusable from a furniture perspective. We will eventually put backed bar stools there but for now we don't have anything. The most logical place for our two couches and two accents chairs are on the walls and corners. It provides the maximum space free, tv visibility and best placement for traffic flow. Unfortunately, it also feels little sterile because we haven't figured out the coffee table/ottoman situation yet.


Let's think about these like a square. Bottom side of the square is the first couch with the gray and gold art. The right side of the square is the other couch with the art shelf above it. The top of the square is the fireplace/window/tv wall with the accent chairs. And the left side is the bar and kitchen entrance. You can get an idea of that area a little in this picture:


M and I tried moving our couches in a number of different configurations including away from the walls, flanking the fireplace, etc. and each way it inhibits traffic flow. It's important to us to have maximum seating (at least 8) in our living room for entertaining...so we don't want to just get rid of a couch.

So this is where you...both of my dedicated readers...can help. Any suggestions? Ideas? Pins that you think might give me ideas? I'm all ears!

Thursday, April 5, 2018

Thursday Thoughts (It's Been a Weird 10 Months)


No, you're reading this right. It's a blog post from me.

So, you may have noticed that I took about 2 months um... a long time off from blogging. A lot has happened over this period of time. LIKE A LOT. I thought I would be done with blogging for good. But lately, I've had that itch again. I just have things to talk about and what better audience than those that are still around in the blogosphere?

Let's catch up quickly over the last 10 months...

Mom
The biggest life change is that my precious mother passed away on July 29th. Things are so different now. I honestly feel so strange about it. I am still a little in shock and don't remember that she's no longer alive sometimes. She was diagnosed with brain cancer (anaplastic astrocytoma) on August 1st of 2016. Her funeral was 364 days after she was diagnosed.

Honestly, I question the "science" of medicine. I question our healthcare system. I question advice that people give me. I sometimes question God. So many "if-onlys" and "what-ifs"...it's hard to really process this. Sometimes grief comes to sucker punch me to the gut and remind me of something random. Grief is such a strange thing. So far, we've been through what was her birthday, my birthday, Christmas and Easter without her. Not yet a full year has gone by and it seems so fresh sometimes. And I fully realize that many people have already walked this walk and been there but I haven't...so this is new for me.

I cannot control when grief decides to visit, but I can choose to remember the fond things and the good times with my mom. I don't want to remember her in pain or agitated or sad. I want to remember her when she was teaching me how to sing or when we would go to museums or on vacation. I want to remember her teaching me how to make Mississippi Mud Cake and how to throw a football.

If you care to read her obituary, it is here.

House
M and I purchased a home in an adjacent city/county to where we were living. We closed on the new house March 16th and have been in a little less than 3 weeks. We absolutely ADORE this new home and the new location. It's got everything we wanted and more. It's a single family home (vs. the townhouse we were in before) and it's more than double the size of our old place. Honestly, we got two couches delivered yesterday that I ordered and that is the first piece of actual furniture I have in the entire downstairs of the house. We brought our bedroom furniture and such and our living room furniture from the townhouse went into the loft living area upstairs in the new house. So...we need end tables, accent chairs, dining room chairs (table was ordered and will be delivered this week), a kitchen table and chairs and bar stools. I keep reminding myself that I don't have to buy it all at once but it's hard not to be overwhelmed with everything we still need to purchase! Here are a few pics. I hope that now since I (maybe? perhaps?) might start blogging a little more I can document the furniture purchase and decorating process.


We listed our townhouse for sale and it had an offer within and hour and under contract within 4 hours. The housing market in the Charlotte area is insane right now. INSANE!

Well, I guess those are the only two big changes since my last post. But those are big enough to warrant my "a lot has happened" comment in the beginning. I hope to keep up with this a bit more frequently but probably not nearly as regularly as before. Stay tuned! Or check back! Or something! :)

Friday, April 7, 2017

Living Room Update

Do we really need to go into depth psychoanalyzing why I keep changing and redecorating my living room? I think not. Honestly, I like to change things up and rearrange furniture or move decor items around a lot to keep things fresh. Well, it's hard to rearrange furniture in our current living room given the set up but I can still swap out the decor items. Here's where we are now:


Yes I have two animal pillows in my living room. It's hard to see the detail on the elephant one (from WalMart!!) but it's got gold accents. The other thing I do quite frequently is switch out my throw pillow covers. Both of those gray/gray check pillows are Ikea pillow forms with Ikea pillow covers. I've had them forever and love them!

The white wall things...because I have no idea what to call them...are actually rubber stair treads we got from Lowe's that I spray painted white and then distressed with M's electric sander.

And as a reminder, here's where we've been in the living room area in the past.


Will I ever get tired of gray? Maybe. But I don't see it happening any time soon. 


Friday, March 17, 2017

Bathroom Update: Painting the Vanity


One of the projects M and I both wanted to tackle was painting our bathroom vanities. It was something we desperately wanted but we were unsure how time consuming of a project it might be...so we kept putting it off.

Well, we bit the bullet and started in the master bathroom this weekend. I'll be honest, I had to work half a day on Friday so M actually ended up doing most of the work with this project. But that is a good indication of how easy it really was!

The entire project took less than a day and we are thrilled with the results!

Our first step was to sand the 11 year old builder-grade oak cabinets. M did the larger parts with a electric palm sander but chose to use regular old sandpaper for the cabinet faces and drawers. Because of the molding on these it was easier for him to use sandpaper. He sanded them all enough to knock the sheen off and rough up the surface a bit for painting. I'd say it took him about 2 hours total to sand everything. He removed the drawers and doors and sanded them all outside because, well, it's kind of messy.

After the sanding was done we headed to Lowe's and picked out our paint. I knew I wanted a blue-tinged dark gray. I like the look of dark vanities with white tops so we figured a darker gray would contrast nicely with the white top and hide any stains well. We ended up going with Valspar Reserve paint in Muskeg Gray. We purchased a couple of chip brushes and some small high-density foam paint rollers specifically for cabinetry and went to town. I started by painting in the door molding and the edges with the brushes and then finished with rolling the wide, flat parts. Overall we did two coats  of paint on everything and it looks great! We ended up painting inside the house in the kitchen area because it was really windy and getting chilly out.

I've never painted anything in the house before and the house not smell like paint. Actually unless you saw the painting stuff in the house, you wouldn't even know it. I smelled NOTHING. No paint fumes, no paint smell. Honestly, I loved that. I didn't pick this paint because of the low odor and no VOCs, but I would definitely pick it again because I loved walking into a house that didn't smelled like paint!

We opted for a semi-gloss since it's a bathroom and this is the most chip and stain resistant. I love it. The final product is a bit more of a babyish gray than I thought but I don't mind it at all. We purchased a gallon of this paint and plan to use it to paint the guest bathroom vanity as well. I'm so happy we chose to do this and it feels like I'm walking into a different bathroom!

Slowly but surely, my house is becoming void of color and much more neutral...i.e. gray and white. And I don't hate it one bit! Here are the before and afters! (Also I know my grays don't all match. I need to get a different rug...maybe a pop of color to tie it all in.)

BEFORE


AFTER


Monday, November 28, 2016

In the Air There's a Feeling of Christmas

Over the last two weekends, M and I took to getting our place ready for Christmas. I don't have a TON of Christmas stuff, but we are collecting more and more over the years. This year's additions included a custom art piece, a few more mini Christmas trees for my mantel and more ornaments for the tree. (Because you really can't have too many ornaments!)


The tree was the same tree as last year and I opted for the same color scheme of turquoise, silver and gold. I added some larger turquoise ornaments this year and some silver and gold filler ornaments to make it look more finished.

The Christmas tree pillow was a recent purchase from Kirklands. As were a few other new things. I really love that store and they have great prices!


The star in the middle and the "striped" tree to the right of it were new purchases this year from Kirklands. 


This is the mantel "lit". The star, two larger background trees and three white trees in the front all light up. It's so pretty at night! I'll add some fresh greenery as we get a little closer to Christmas. Last year I did it too early and it dried out from the fireplace below. (Lesson learned!) 


Last year I didn't really know how to display my snowman collection. This year I chose to display on the rustic kitchen shelf that M made and just added a bunch of stuff until I thought it looked good. HA! I think the look of the shelf plus the candles and greenery give it a rustic, farmhouse-y vibe. Maybe? 


The outside of the house is decorated! It looks like we only did half of the large bush on the left but the bush is actually trimmed like that. Like a mushroom shape so we covered the green part. It just looks weird in the pic. I left the outdoor decor scheme to my Director of Outdoor Illumination (that's what M appointed himself as) but I think it turned out really pretty! 

I love nothing more than to turn on the Christmas tree as I get ready in the morning and just look at it. It's so gorgeous! I wish I could keep it up year round.

Monday, November 7, 2016

Bedroom Swoon + Updates

I love our bedroom. But I've really be yearning to brighten it up a bit. It's a little dark and I want it to be lighter. Our bedroom furniture (which I love) is dark and huge. It's just not a great fit for the size of our room and when we go to sell the place, it makes the bedroom look pretty small. For reference, here's what I'm working with currently...well...sort of currently. We have a different gray duvet but basically the same color palette and look.


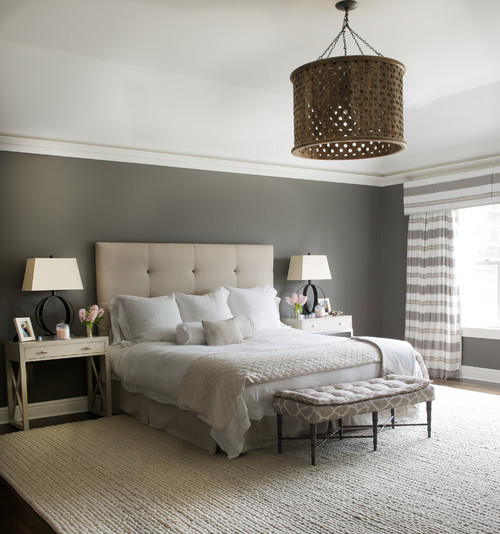
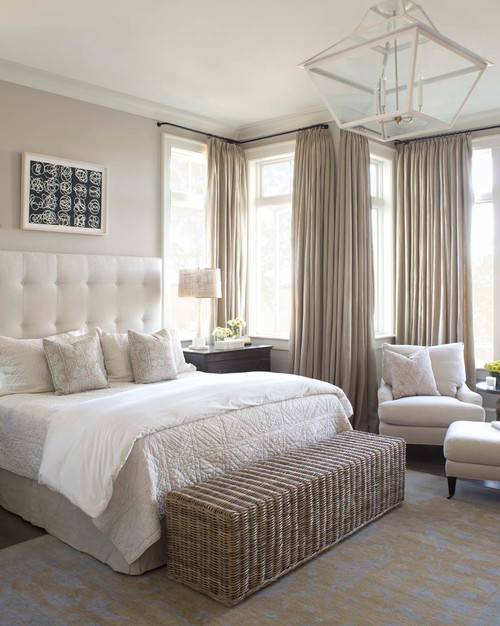
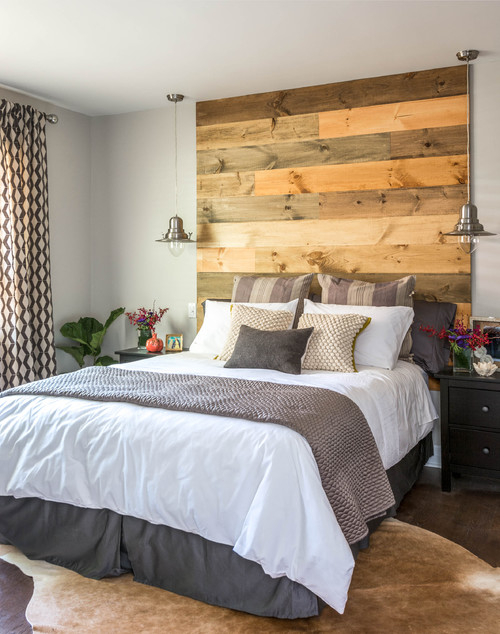
And here are some ideas I've seen lately on Houzz. Based on the similarities in the pictures, I guess I should be looking for an upholstered headboard...or no headboard at all and a rustic wood wall. :) We will probably sell our bedroom set and look for something lighter and smaller...or go with no bedroom set at all and just do a headboard and a dresser and something different for the end tables. We aren't in a rush to do anything yet, but it's good to get some ideas, right?

porfolio
Bedrooms
Marsh-side Retreat
Bedrooms
Princess Margaret Residence
Brooklyn Brownstone

Monday, October 10, 2016

DIY Farmhouse/Cottage Pendant Light from a Trashcan


I'm really into bits and pieces of the farmhouse/cottage style that's all the rage these days...especially the lighting. After swooning over so many gorgeous pendant lighting fixtures, I almost (ALMOST) bit the bullet with something I sort of liked in my price range.

Then, I was at Target (aka the happiest place on Earth) and I saw this cute wire trashcan in the Dollar Spot section. It's entirely too small to be a functional trashcan, by the way, but it was perfect for an idea I had ruminating in my head.


I really wanted to try and make my own farmhouse style pendant lighting to replace the bare Edison bulbs we had in the kitchen (peep from the end of this post). I love the light fixture, but it wasn't practical since a) anyone over 5'4" would hit their head on it and b) it was too large for that particular area. (We had the strands almost all the way up and they were still too long).

So I asked M if he could help me. Now, let's be honest, I couldn't have done this project without M. I had the idea but he basically did most of the work. I'll try to explain the steps as simply as possible. Along with the trashcan we purchased a pendant lighting kit from Lowe's. We bought this one but you could swap for a less expensive one and this project would be even cheaper.

First, M took some wire cutter things and removed the label/badge part and the handles from the basket. Then he measured and taped off to find the center of the bottom (where the light fixture would sit). He used a drill to make a hole in the center of the basket that was wide enough to push the pendant light fixture through but also small enough for it to be snug.


After he got the light fixture situated, he sanded a bit around the hole (to remove the metal shavings) and then I spray painted it. I opted for a matte black since we have a ton of white in the kitchen and I wanted it to stand out. 


After it dried, M removed our old light and installed this one. Now, here's a note of caution. M went to school for electrical stuff so he knows what he's doing. Because I wanted this one to hang much higher than the other, he had to cut about 3 feet of wire and re-wire it a bit. Most people probably won't have this issue, especially if you have higher ceilings. Anywho, so once he got it installed I was absolutely thrilled! We put one of the Edison bulbs from the old fixture in there for now. But we'll probably replace with an LED bulb soon to get more light. 


It looks off-centered but that's just because of where I was taking the photo.  I'm not the best at taking great interior photos...however I promise a better one when the light is better. Follow me on Insta to see a better photo later today. :) We were losing light as this project was wrapping up! 

I am obsessed with this pendant light. It's the perfect touch of farmhouse/cottage style and is high enough to not be a hazard for tall people. For less than $30 we got an awesome light fixture that was EXACTLY what I wanted! 

Monday, April 18, 2016

In Our House


In Our House

M tends to clean the kitchen. I am so blessed.

You won't have to take off your shoes to come in.

There is a scattering of living (dare I say thriving) house plants, placed high enough so that *someone with 4 legs who shall remain nameless* doesn't mistake them for outside plants...and pees on them.

We have a whole shelf/cart of liquor and almost never drink it.

You won't find a coffeemaker. #sorrynotsorry

We hardly ever open windows because of my allergies. But you will also hardly ever see blinds or curtains closed during the day. LET THERE BE LIGHT!

You won't ever see overhead lighting...well in the areas that I govern at least. In the man cave, who knows?

The throw pillows will be set perfectly if no one is sitting on the couch.

There is a folded snuggie next to the couch if you need it.

Everything has a place.

There are bare walls...not because I like it, but because I'm picky about my art/wall decor.

Surfaces will be clear. A cluttered surface = anxiety for me.

You'll be hard pressed to find anything red. Or warm colors. #teamgraysandblues

We go sometimes weeks without touching the thermostat. Our house stays cool most of the time, which we both prefer. (And by cool I mean between 68 and 72 degrees.)

What about you? What about your house?


Inspired by Steph's post. 


Monday, March 28, 2016

Springy To-Do List

Now that spring is officially here, there are a number of things on my "Springy To-Do List".

via Unsplash


1. Start incorporating more fresh flowers in my house and use this pin to do a better job at arranging them.
2. Along those lines, I'd like to start planning a flower garden in my backyard. I live in Zone 8a (USDA Plant Hardiness Zone) so if anyone else is a fellow Zone 8a-er and has any suggestions for what does well in red clay soil, I'm all ears!
3. Deep clean my house. I might actually hire someone. It's so much easier to do the heavy, heavy cleaning that is hard to keep up with. #judgmentfreezone
4. Spruce up our back patio and front porch. Maybe add planters or rearrange?
5. Hike, hike and hike! There are few new trails I found out about near our house we haven't tried yet.
6. Use my new camera and take some nature shots. I really struggle with making time for this. It's such a joy of mine and I rarely make time for it.
7. Spring-ize my mantel. It's currently in winter mode.


What about you? What's on your spring to-do list?


Monday, March 7, 2016

Our New Home: Another Kitchen Update


It's time for another kitchen update. (Aren't y'all just so excited?!) I feel like that's the only thing I ever talk about in our new house...but to be fair, it was the room that needed the most work. Two weekends ago, we took it upon ourselves to paint our kitchen cabinets. They were a builder grade honey oak which I personally abhorred. We wanted them white. So we decided to do that over the course of a weekend. After much research, we purchased General Finishes milk paint on Amazon (because of the stellar reviews) and got to work on a Friday.

I can go into detail on another post some day, I didn't love the paint and we will probably need to go back over the inside of the cabinets again in a few months. But, it got painted!

To refresh your memory, here's what we started with...


And here's the newly-painted version:


I'm very pleased with how light it makes the kitchen. The rest of my house is very light and airy and to have a darker kitchen just didn't flow. We think it makes the kitchen look a lot bigger. We also added some drawer pulls to the working drawers. We reused the original door pulls which were satin nickel. I'd originally wanted to replace them but those suckers are EXPENSIVE! And because we have 21 cabinet doors, it would have been too much money.

Still on the list is to replace the counter tops, stove and microwave but we've made a lot of progress already! Read up on the other kitchen updates here and here.

SEARCH THIS BLOG